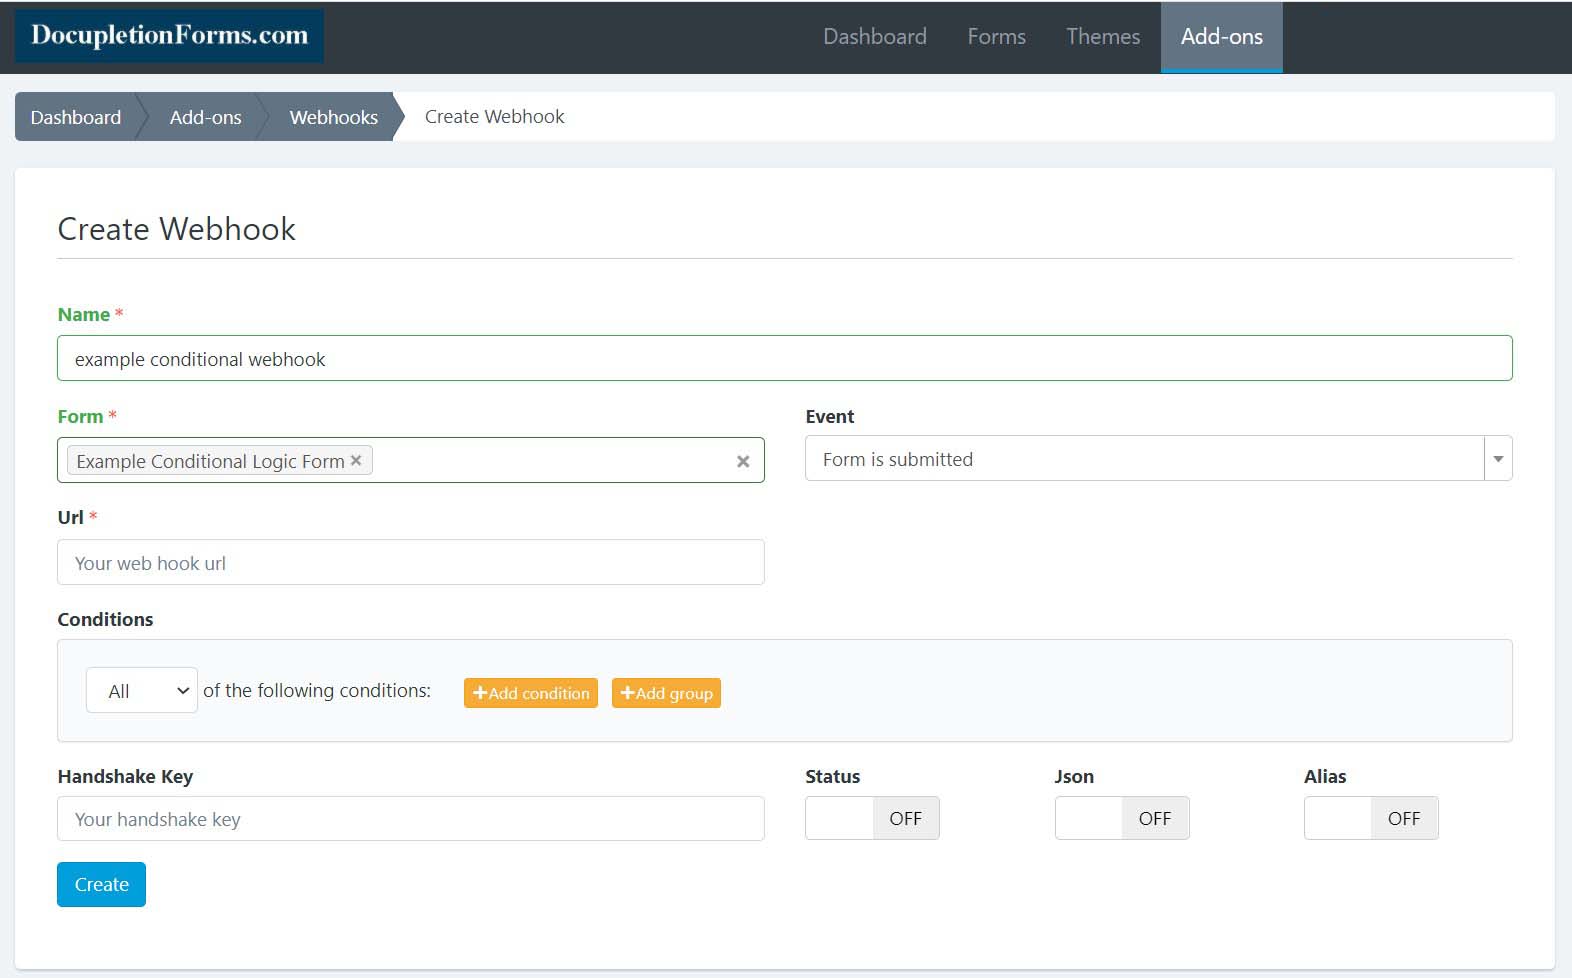
Conditional Webhooks!

CONDITIONAL WEBHOOKS!

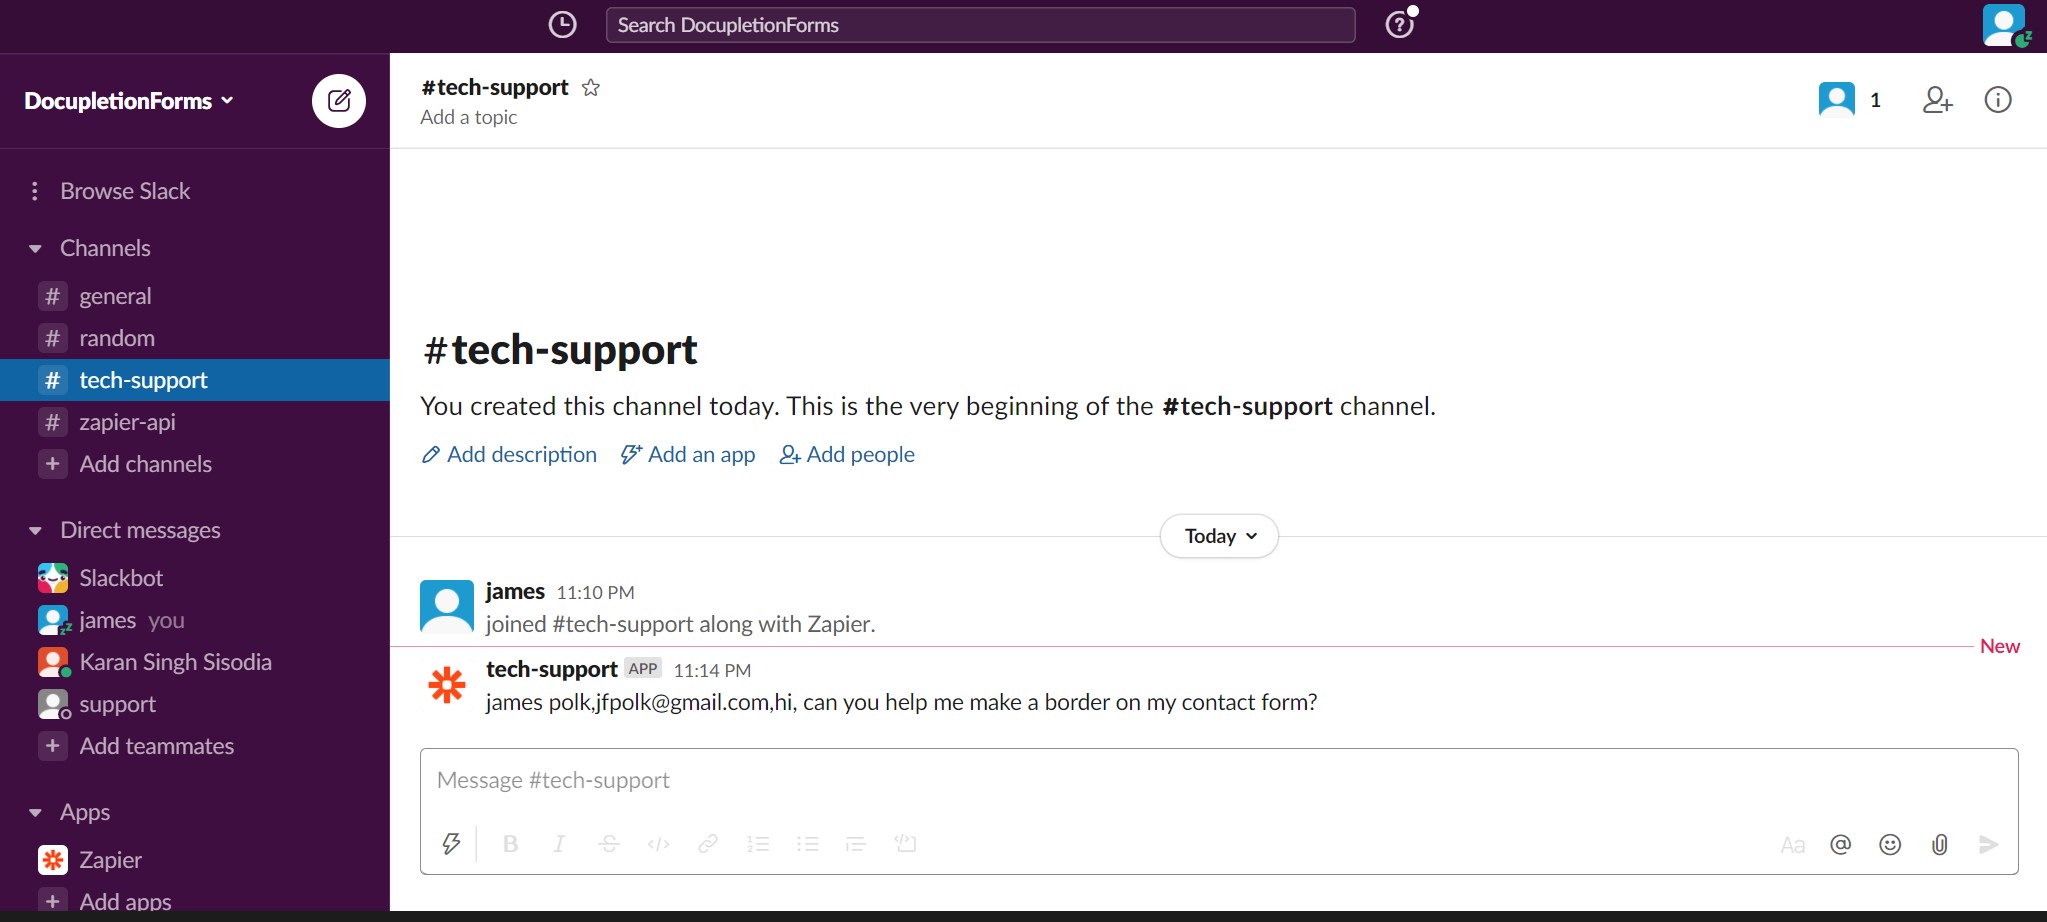
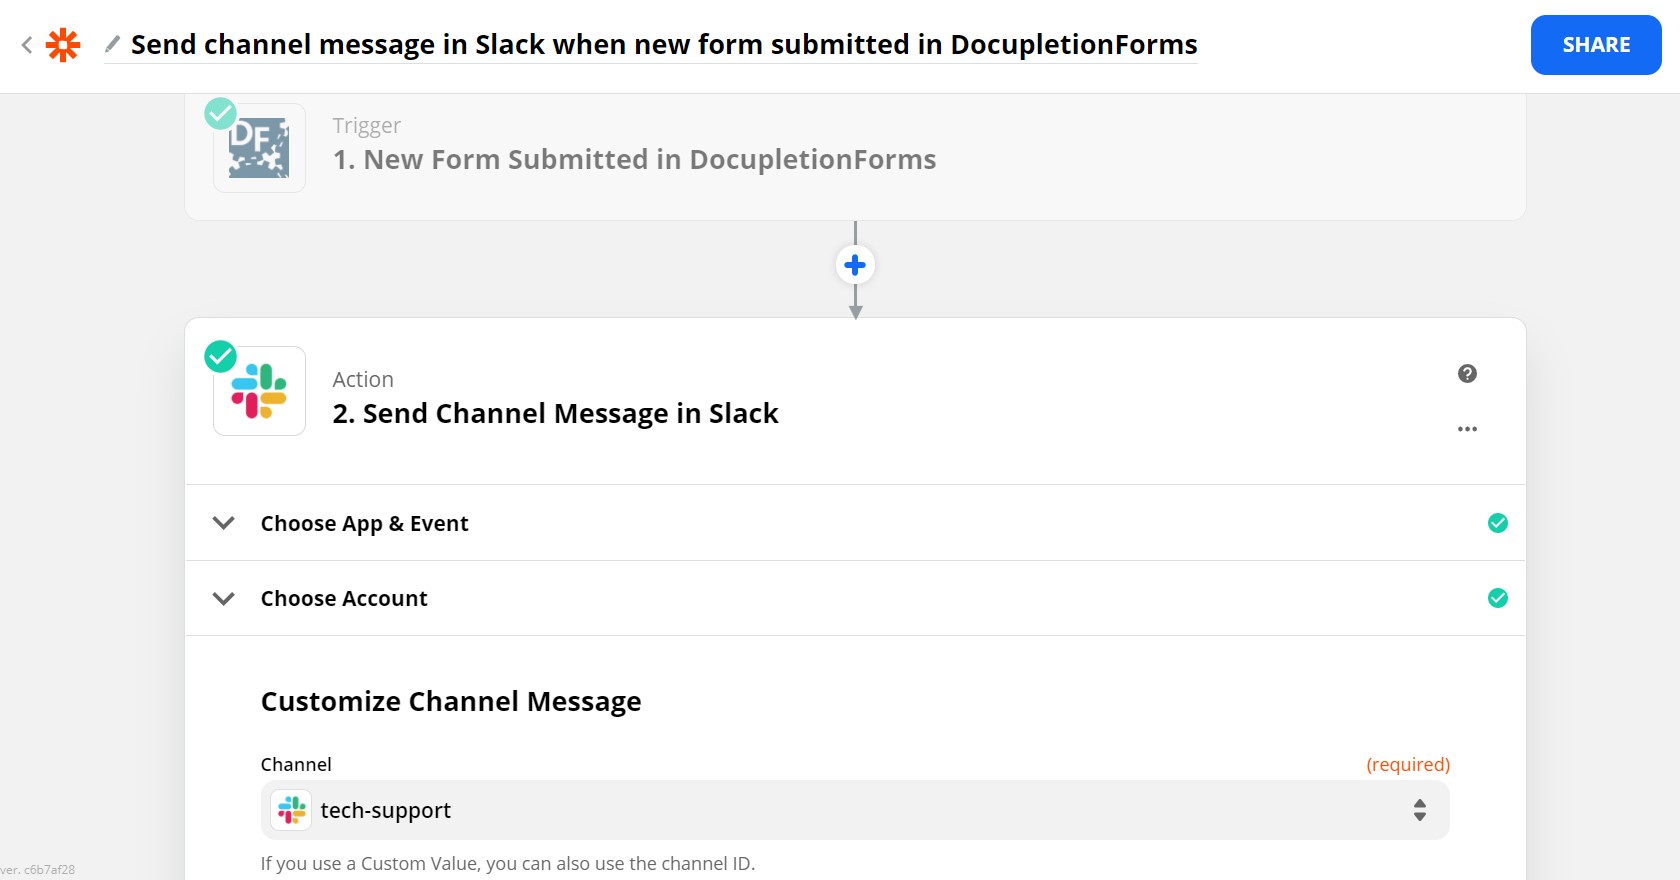
When somebody enters their information into your form, you can send CONDITIONAL WEBHOOKS to Zapier or anywhere else on the internet based on the conditions that you set.  Depending on how the people who submit your form answer your questions, different triggering webhooks will be sent to Zapier and Zapier will then trigger an action in any of the 2000+ programs as you determine in the Zap inside of your Zapier account.

  • You can ask people if they would like to also be added to your weekly email list when they leave you a contact form and if they click “yes” you can then send a CONDITIONAL WEBHOOK to Zapier to trigger the inclusion of a name and email in the email series program that you use.
  • You can send a CONDITIONAL WEBHOOK to FormStack Documents (formerly WebMerge) that will use the data entered into the form to automatically fill out a document.
  • You can add a contact in Clio.
  • You can add a Loop in DotLoop.
  • The list goes on.  There is no limit to the number of CONDITIONAL WEBHOOKS that you can send.

Zap from DocupletionForms to Slack via Zapier and make a channel message!

This is a really cool zap that will allow you to invite the people you want from your team to see the messages submitted via a specific contact form by zapping them to Slack via Zapier and using Slack to invite your Team Members!

1. Make a contact form. 

2. Create a Slack Channel to send messages to.

3. Connect to Zapier.

4. Select your Contact Form in your Zapier.

5. Select your Slack and the Slack Channel.  

6. Boom!  The Zap is done and messages will appear in your Slack.

7. Invite the team members you want to be able to see that Slack Channel.  

Rackspace Microsoft365 Reseller

We have added Rackspace’s Microsoft365 Business Partner Reseller Package to our upgraded subscription.  You set everything up inside of the program where it says “WHMCS” at the top of the menu bar.

We made Conditional Webhooks this year and are finishing our automatic document selection and completion utility functionality of the “Merge”

Our WordPress setup is automatic using WHMCS. 

We are finishing adding the CRM, Auto-Email.

After all of that we are finishing our Single Sign-On then our RetainerCrypto.Online Crypto Utility Token.

hidden fields for tracking

This is a simple 3-step instructional to show you how to setup a “hidden field” with a proper “label” and “alias” for tracking.  

  1. build a form with a hidden field and give an appropriate label name and set the alias to a proper term for tracking.
  2. add a ? followed by the alias, an = sign and then the tracking term.
  3. then when somebody submits a form like the one above, the submission will contain the term from after the = sign, in this example “turner”.


zapier beta testing submission

This Zapier Integration Submission took us 13-10 months depending on whether you look at when I made the first payment or when I started the planning with my 3 software engineers. Anyways, we are a couple of weeks away from being up on the live Zapier platform for the world to see inside of the “Forms” set of programs. There were 80 form programs when we started and now there are like 110, but it is still a great number to be working to be a part of. No idea how long the “Beta Testing” phase will take. We shall see. 😎 

– click here to use the direct private invite.

Our API is Complete!

This API section of the “Manage Account” Drop-Down Menu is Brand New!  We are finishing our connection with Zapier.com, so currently you can only connect our program with Zapeir via this private invite, but in a short time you will be able to find us on their site.  Simply generate an API key and then enter it into Zapier to connect your forms to Zapier so you can Zap data to 1500+ programs!

28 FREE Addons!

These Addons are all FREE!  We are working on making a set of Instructions for the Addons.  They are 100% FREE!  We are working on adding a CRM and an Automatic Email Series Functionality which are going to be a part of the $5 Monthly Subscription because you will be required to connect the Email Functionality to an outside SMTP (we recommend SendGrid.com) which will cost around $10-$15 Monthly, but it is a normal thing to need in the world of online integration.  After a while we are planning on making the same Email Functionality a part of what will become our $35 Monthly Subscription but with the additional option of using our PowerMTA Server so that you do not need an SMTP Server Subscription.  We will keep you posted as we make progress.

Customize a Confirmation Message

Customizing the message 

You can insert field variables into a confirmation email and they’ll be replaced with whatever the user insert into that field.

Every variable must be between a double punctuation keys. Eg. {{My Variable}}

In the following example, we show the two ways you can insert the variables:

  • By using the field label: The variable {{Your Name}} has been inserted to the confirmation email and will be replaced by the name that the person puts in the Form.
  • By using the ID field: In the picture you can see the variable {{text_263547}}, the same relates to the field {{Your Name}} of the form. In other words, we can use both types of variables to get field information. If your field doesn’t have a label, this is the option you should use.

Additionally, you can use the following placeholders:

  • {{form_id}}: Form ID.
  • {{form_name}}: Form Name
  • {{submission_id}}: Submission ID
  • {{submission_number}}: Submission Number
  • {{submission_table}}: The content of all the form fields
  • {{created_at}}: Date of Submission
  • {{ip_address}}: IP Address.
  • {{user_agent}}: Browser’s User Agent of Sender.
  • {{url}}: Web page url where the form was embedded.
  • {{referrer}}: Web page url from where the visitor has arrived to the form.
  • {{country}}: Country of Sender.
  • {{city}}: City of Sender.
  • {{longitude}}: Geographic coordinate that specifies the east-west position of Sender.
  • {{latitude}}: Geographic coordinate that specifies the north–south position of Sender.
  • {{optin_link}}: To present the link to the Opt-In Confirmation Page.

This is a great way to personalize your message. Any form field can be used in this way.