Customize a Confirmation Message
Customizing the message
You can insert field variables into a confirmation email and they’ll be replaced with whatever the user insert into that field.
Every variable must be between a double punctuation keys. Eg. {{My Variable}}
In the following example, we show the two ways you can insert the variables:
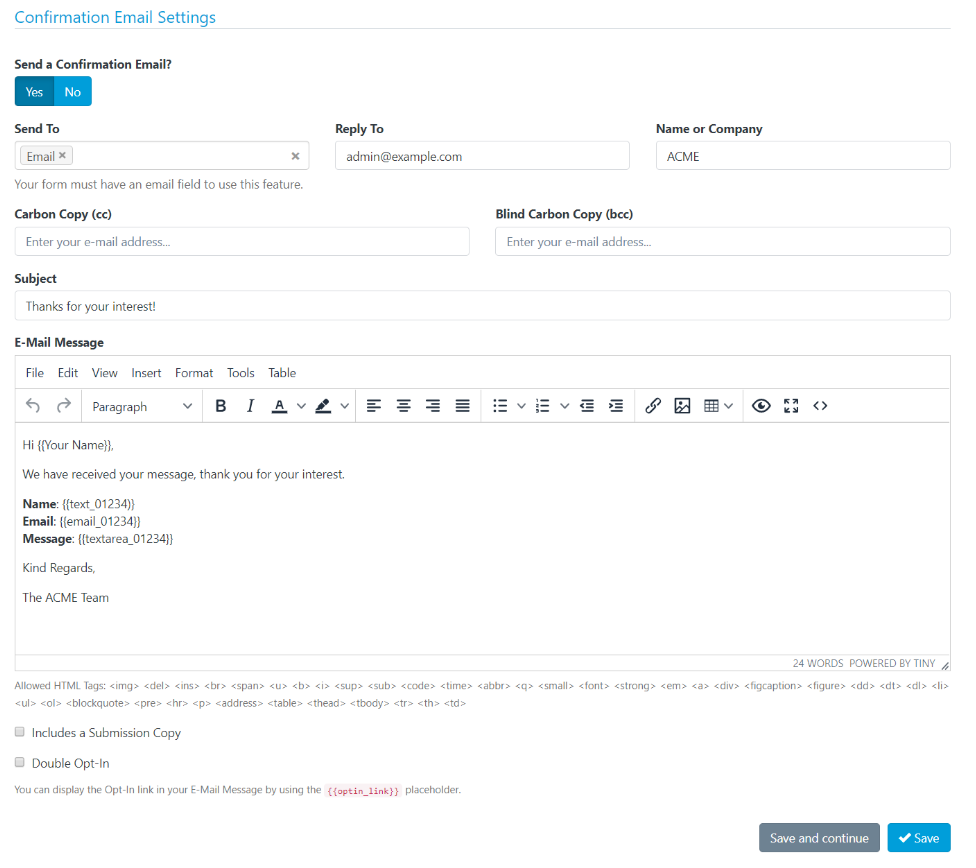
- By using the field label: The variable {{Your Name}} has been inserted to the confirmation email and will be replaced by the name that the person puts in the Form.
- By using the ID field: In the picture you can see the variable {{text_263547}}, the same relates to the field {{Your Name}} of the form. In other words, we can use both types of variables to get field information. If your field doesn’t have a label, this is the option you should use.
Additionally, you can use the following placeholders:
- {{form_id}}: Form ID.
- {{form_name}}: Form Name
- {{submission_id}}: Submission ID
- {{submission_number}}: Submission Number
- {{submission_table}}: The content of all the form fields
- {{created_at}}: Date of Submission
- {{ip_address}}: IP Address.
- {{user_agent}}: Browser’s User Agent of Sender.
- {{url}}: Web page url where the form was embedded.
- {{referrer}}: Web page url from where the visitor has arrived to the form.
- {{country}}: Country of Sender.
- {{city}}: City of Sender.
- {{longitude}}: Geographic coordinate that specifies the east-west position of Sender.
- {{latitude}}: Geographic coordinate that specifies the north–south position of Sender.
- {{optin_link}}: To present the link to the Opt-In Confirmation Page.
This is a great way to personalize your message. Any form field can be used in this way.