DocupletionForms Zapier Integration V1.4 Update COMPLETE!
DocupletionForms Zapier Integration – Version 1.4
Officially Promoted on Zapier
Version 1.4 is now live and publicly approved by Zapier.
After full draft testing, the integration has been successfully promoted and is production-ready.
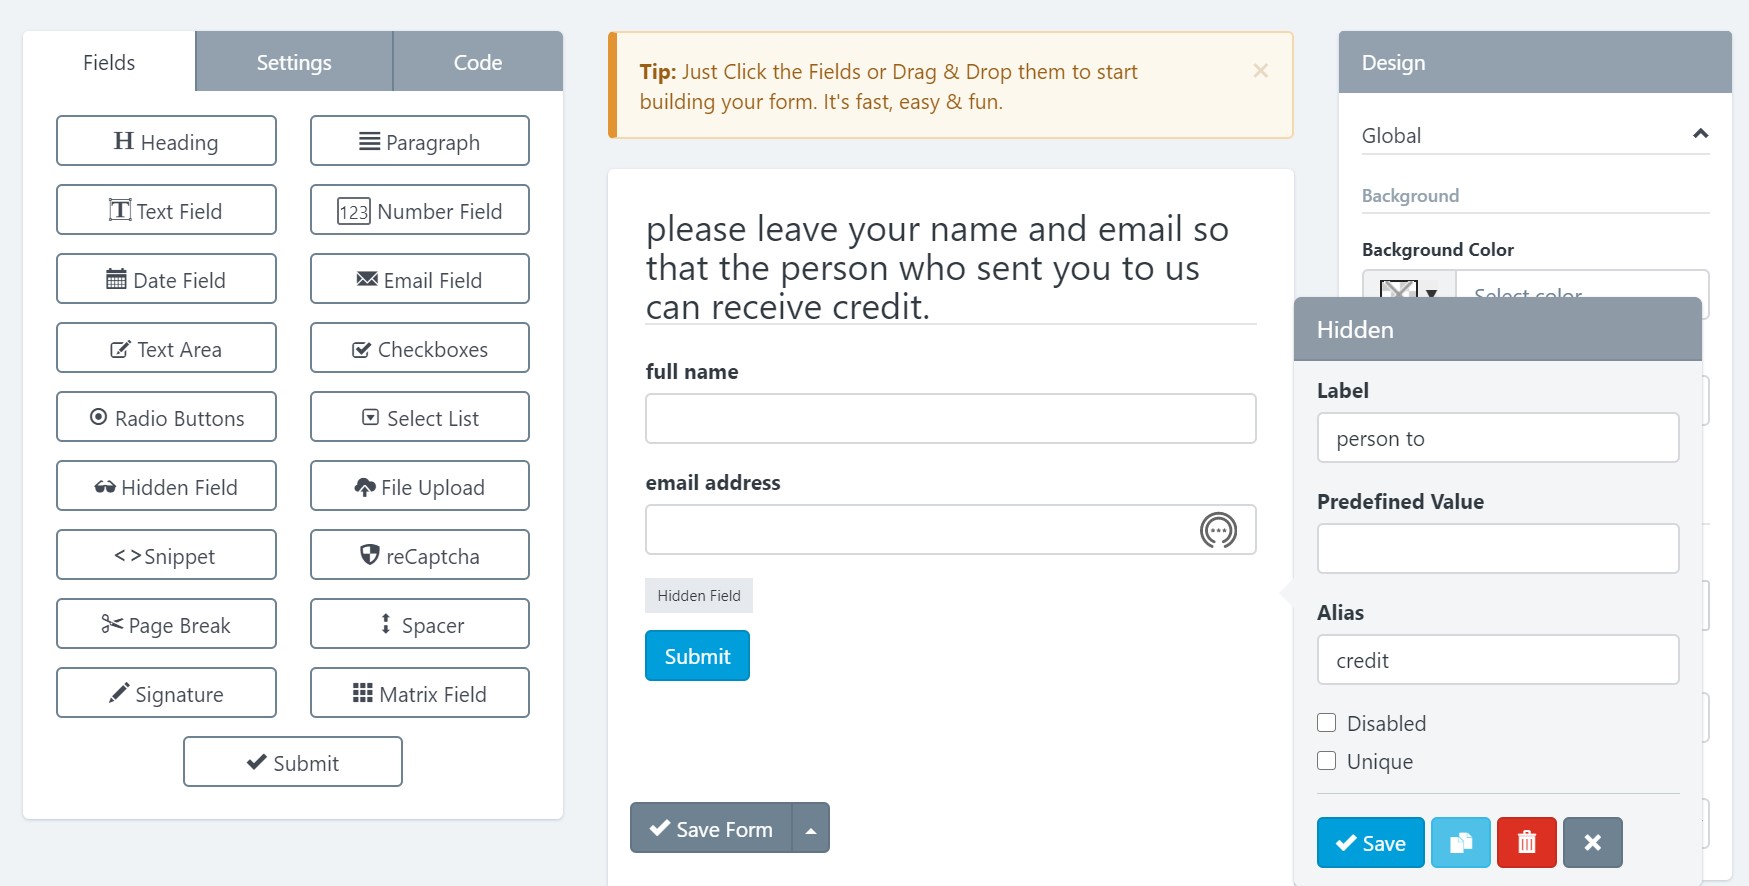
What Version 1.4 Enables
With DocupletionForms v1.4, you can:
- Send data from any Zapier-supported application
- Map that data to a DocupletionForms form
- Automatically merge the data into one or multiple PDF documents
- Deliver the generated PDF via email or downstream Zapier automation
Automation Flow:
Any App → Zapier → DocupletionForms → Data-Merged PDF → Anywhere
Any App → Zapier → DocupletionForms → Data-Merged PDF → Anywhere
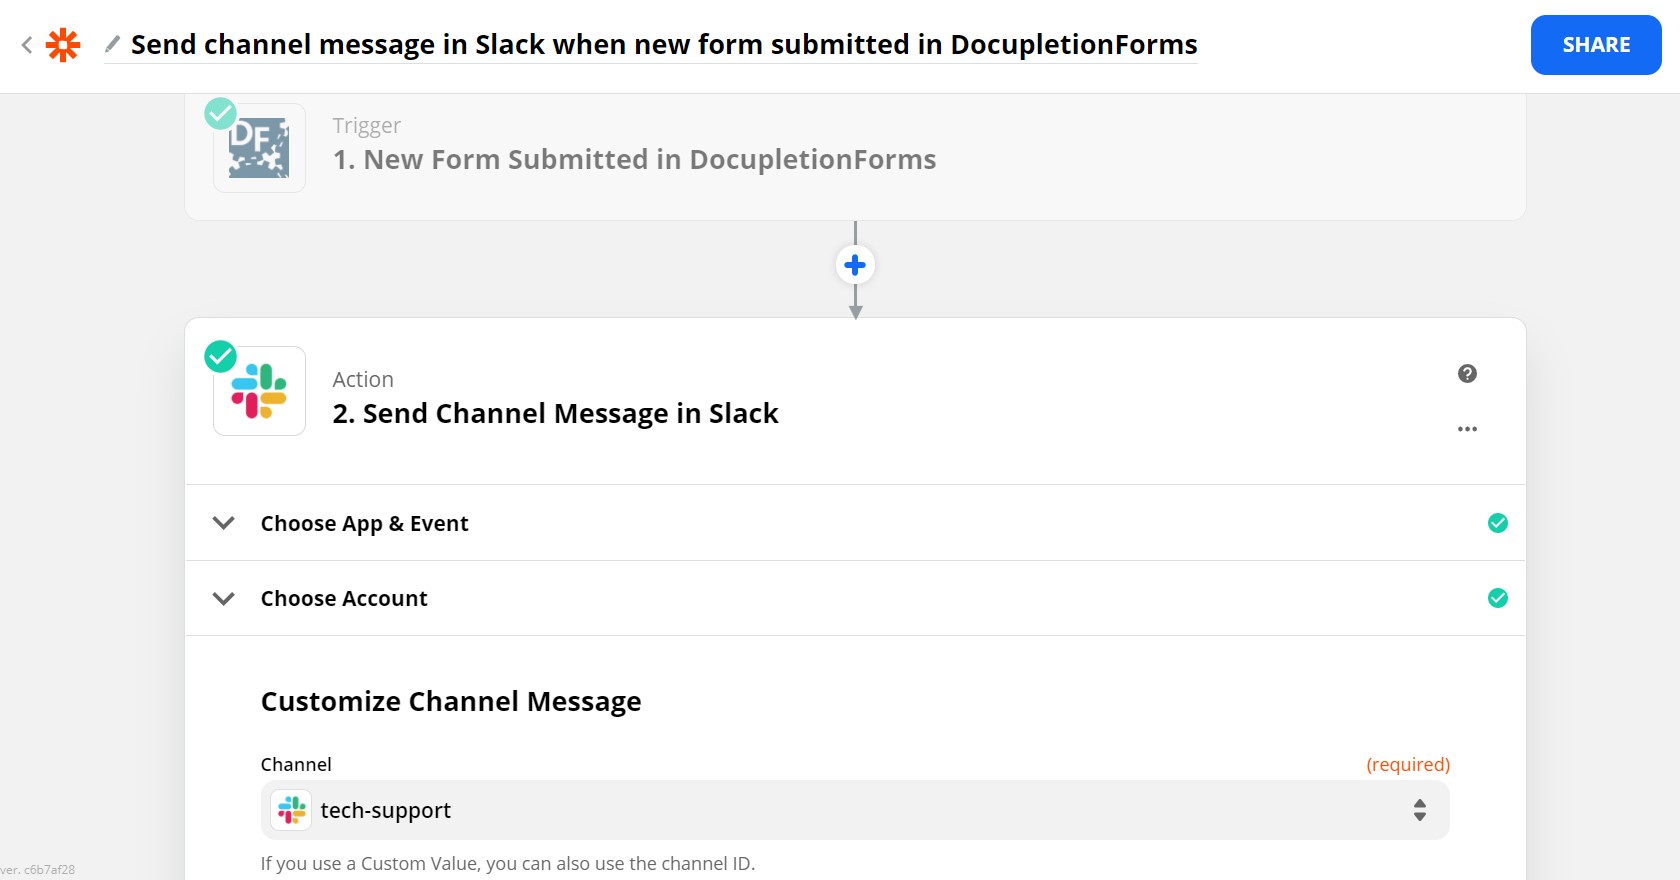
How the Workflow Works
Example: Google Sheets → Automated PDF
- A new row is added in Google Sheets
- Zapier triggers
- Zap sends the sheet data to DocupletionForms
- Form fields are mapped to incoming data
- Internal Data-Merge maps form fields to PDF fields
- PDF is generated automatically
- The PDF is emailed or sent through additional Zap steps
The original data can also continue downstream in Zapier.
Core Value Proposition
Middleware Integration-as-a-Service
Instead of building custom PDF engines or backend automation pipelines, you simply:
- Map fields
- Configure merge settings
- Connect through Zapier
- Automate document output
No custom code required.
Why This Is Powerful
Most automation tools move data. Few can:
- Convert structured data into properly formatted PDFs
- Support internal conditional logic
- Handle multi-document merges
- Distribute documents through multiple delivery paths
Version 1.4 delivers stable, production-ready PDF automation inside Zapier.
Ideal Use Cases
- Legal document automation
- Contract generation workflows
- Government or nonprofit form processing
- SaaS platforms needing PDF generation
- HR onboarding packets
- Insurance documentation
- Real estate contracts
- Compliance or structured documentation pipelines
What’s New in v1.4
- Officially promoted to Public by Zapier
- Improved stability after draft testing
- Enhanced data handling in Zap-based submissions
- Reliable downstream Zap continuation
- Production-ready PDF merge workflows
Architecture Overview
External App
↓
Zapier Trigger
↓
DocupletionForms Form Submission
↓
Internal Field Mapping
↓
PDF Data-Merge Engine
↓
Email or Zapier Output
↓
Zapier Trigger
↓
DocupletionForms Form Submission
↓
Internal Field Mapping
↓
PDF Data-Merge Engine
↓
Email or Zapier Output
Reliability & Approval
Version 1.4 has been:
- Fully tested in draft mode
- Approved and promoted by Zapier
- Verified for public production use
Get Started
- Create a Zap
- Select your trigger app
- Choose DocupletionForms
- Map your fields
- Configure your PDF merge
- Test and activate
You now have fully automated document generation.

 THIS IS HUGE! Checkboxes have been historically difficult! Our new release inside of DocupletionForms.com is the ability to check multiple checkboxes at one time with one condition and/or any multiple set of conditions or group of conditions paired with other group conditions. You can also set the minimum and/or maximum number of checkboxes that will be checked inside of the PDF from the FormBuilder itself. This is a simple release note and we are going to be working on more instructions and examples. The way it did function inside of DocupletionForms.com was that you could only use the checkbox utility in the form and it would only check one checkbox at a time. Now you can trigger a checkbox to be checked in a PDF by any combination of conditions that a form submission presents. It is possible from time to time that the PDF you are attmepting to automate will not allow inputs from outside programs via embedded programming in their meta data. This is an issue no matter what and you have to become a PDF expert and flatten the PDF and then make your own fill-in-the-blanks, which is outside the scope of our program. We work on California Judicial Council Forms and they tend to be the most difficult types of documents in general across all industries, but as such, any other PDF Document tends to be much easier to automate!