formatting time in Zapier

The date time is sent as unix timestamp (integers). This solves the issue related to time zones between 3rd party servers. For example, this is the webhook data that is sent:
{
  “id”: 500,
  “form_id”: 125,
  “form_name”: “TEST Form”,
  “number”: 10,
  “ip”: “”,
  “created_at”: 1610484007,
  “updated_at”: 1610484007,
  “created_by”: 22,
  “updated_by”: 22,
  “status”: null,
  “new”: null,
  “answers”: {
    “Name”: “John”,
    “Email”: “john@example.com
  },
  “country”: “”,
  “city”: “”,
  “latitude”: “”,
  “longitude”: “”,
  “user_agent”: “Mozilla/5.0 (Windows NT 10.0; Win64; x64) AppleWebKit/537.36 (KHTML, like Gecko) Chrome/87.0.4280.141 Safari/537.36”,
}
Then with Zapier you can use the Format action to convert the unix timestamp value to a date / time format, before send the value to the 3rd party app.
The above Format Step comes between the Trigger and the Action Steps in a Zap.

Conditional Webhooks!

CONDITIONAL WEBHOOKS!

When somebody enters their information into your form, you can send CONDITIONAL WEBHOOKS to Zapier or anywhere else on the internet based on the conditions that you set.  Depending on how the people who submit your form answer your questions, different triggering webhooks will be sent to Zapier and Zapier will then trigger an action in any of the 2000+ programs as you determine in the Zap inside of your Zapier account.

  • You can ask people if they would like to also be added to your weekly email list when they leave you a contact form and if they click “yes” you can then send a CONDITIONAL WEBHOOK to Zapier to trigger the inclusion of a name and email in the email series program that you use.
  • You can send a CONDITIONAL WEBHOOK to FormStack Documents (formerly WebMerge) that will use the data entered into the form to automatically fill out a document.
  • You can add a contact in Clio.
  • You can add a Loop in DotLoop.
  • The list goes on.  There is no limit to the number of CONDITIONAL WEBHOOKS that you can send.

Zap from DocupletionForms to Slack via Zapier and make a channel message!

This is a really cool zap that will allow you to invite the people you want from your team to see the messages submitted via a specific contact form by zapping them to Slack via Zapier and using Slack to invite your Team Members!

1. Make a contact form. 

2. Create a Slack Channel to send messages to.

3. Connect to Zapier.

4. Select your Contact Form in your Zapier.

5. Select your Slack and the Slack Channel.  

6. Boom!  The Zap is done and messages will appear in your Slack.

7. Invite the team members you want to be able to see that Slack Channel.  

hidden fields for tracking

This is a simple 3-step instructional to show you how to setup a “hidden field” with a proper “label” and “alias” for tracking.  

  1. build a form with a hidden field and give an appropriate label name and set the alias to a proper term for tracking.
  2. add a ? followed by the alias, an = sign and then the tracking term.
  3. then when somebody submits a form like the one above, the submission will contain the term from after the = sign, in this example “turner”.


Our API is Complete!

This API section of the “Manage Account” Drop-Down Menu is Brand New!  We are finishing our connection with Zapier.com, so currently you can only connect our program with Zapeir via this private invite, but in a short time you will be able to find us on their site.  Simply generate an API key and then enter it into Zapier to connect your forms to Zapier so you can Zap data to 1500+ programs!

28 FREE Addons!

These Addons are all FREE!  We are working on making a set of Instructions for the Addons.  They are 100% FREE!  We are working on adding a CRM and an Automatic Email Series Functionality which are going to be a part of the $5 Monthly Subscription because you will be required to connect the Email Functionality to an outside SMTP (we recommend SendGrid.com) which will cost around $10-$15 Monthly, but it is a normal thing to need in the world of online integration.  After a while we are planning on making the same Email Functionality a part of what will become our $35 Monthly Subscription but with the additional option of using our PowerMTA Server so that you do not need an SMTP Server Subscription.  We will keep you posted as we make progress.

Customize a Confirmation Message

Customizing the message 

You can insert field variables into a confirmation email and they’ll be replaced with whatever the user insert into that field.

Every variable must be between a double punctuation keys. Eg. {{My Variable}}

In the following example, we show the two ways you can insert the variables:

  • By using the field label: The variable {{Your Name}} has been inserted to the confirmation email and will be replaced by the name that the person puts in the Form.
  • By using the ID field: In the picture you can see the variable {{text_263547}}, the same relates to the field {{Your Name}} of the form. In other words, we can use both types of variables to get field information. If your field doesn’t have a label, this is the option you should use.

Additionally, you can use the following placeholders:

  • {{form_id}}: Form ID.
  • {{form_name}}: Form Name
  • {{submission_id}}: Submission ID
  • {{submission_number}}: Submission Number
  • {{submission_table}}: The content of all the form fields
  • {{created_at}}: Date of Submission
  • {{ip_address}}: IP Address.
  • {{user_agent}}: Browser’s User Agent of Sender.
  • {{url}}: Web page url where the form was embedded.
  • {{referrer}}: Web page url from where the visitor has arrived to the form.
  • {{country}}: Country of Sender.
  • {{city}}: City of Sender.
  • {{longitude}}: Geographic coordinate that specifies the east-west position of Sender.
  • {{latitude}}: Geographic coordinate that specifies the north–south position of Sender.
  • {{optin_link}}: To present the link to the Opt-In Confirmation Page.

This is a great way to personalize your message. Any form field can be used in this way.

Setup a webhook from your form to your Zapier or Zap using the Direct Zapier Connection. You can Zap to Gmail or ActiveCampaign!

Our Direct Zapier Connection is up and operational and you no longer have to webhook to Zapier, but you still can.  It is FREE on our end to use Zapier and to use Webhooks.  Zapier is a FREE External Integration Program and with their Upgraded Subscriptions you can create Webhooks.

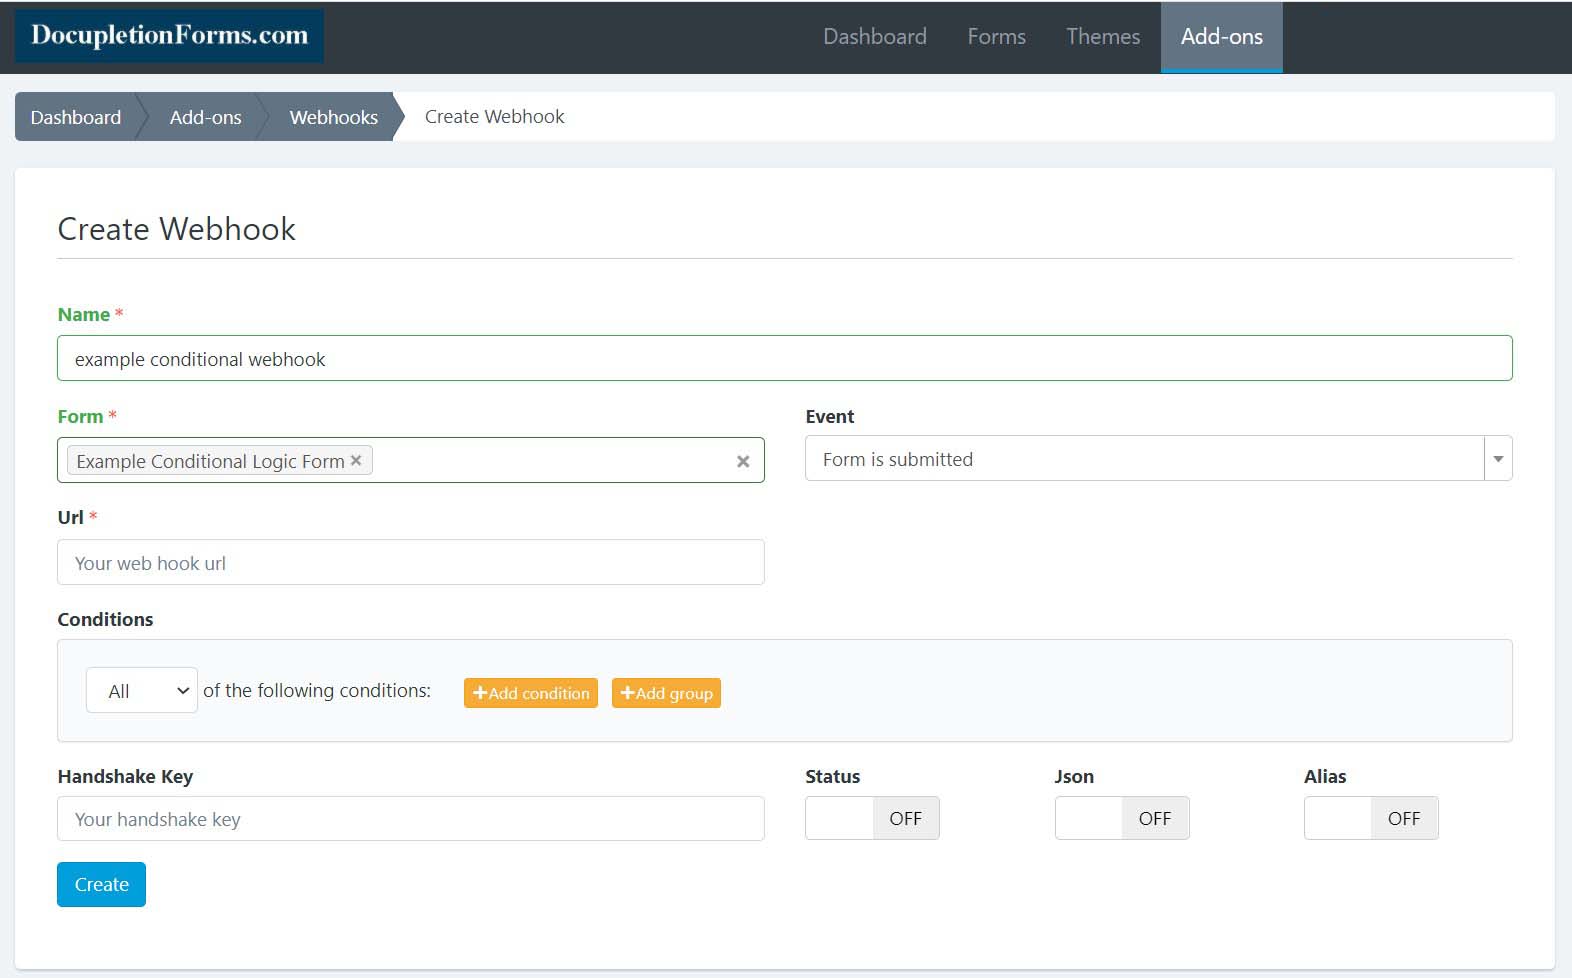
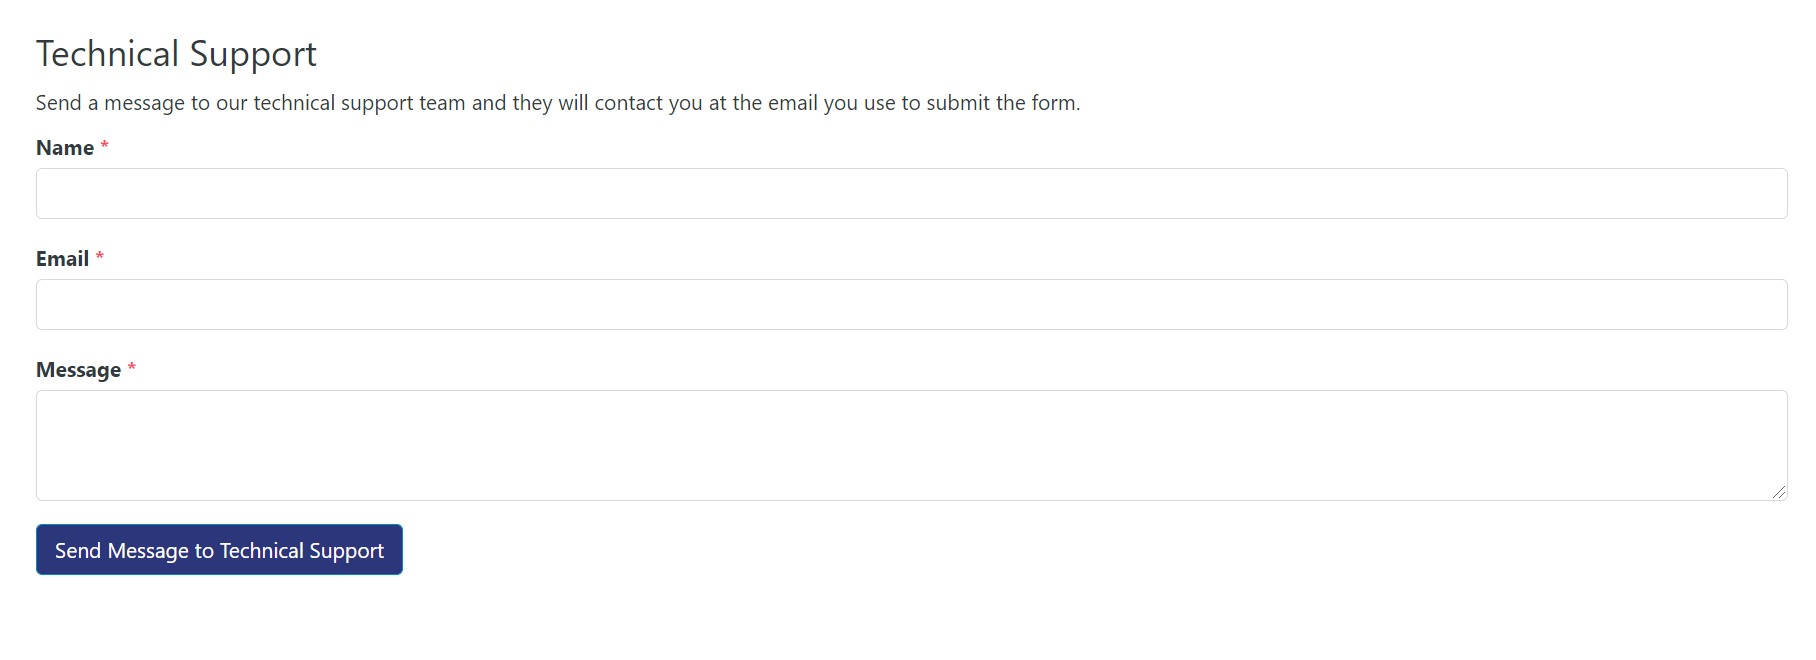
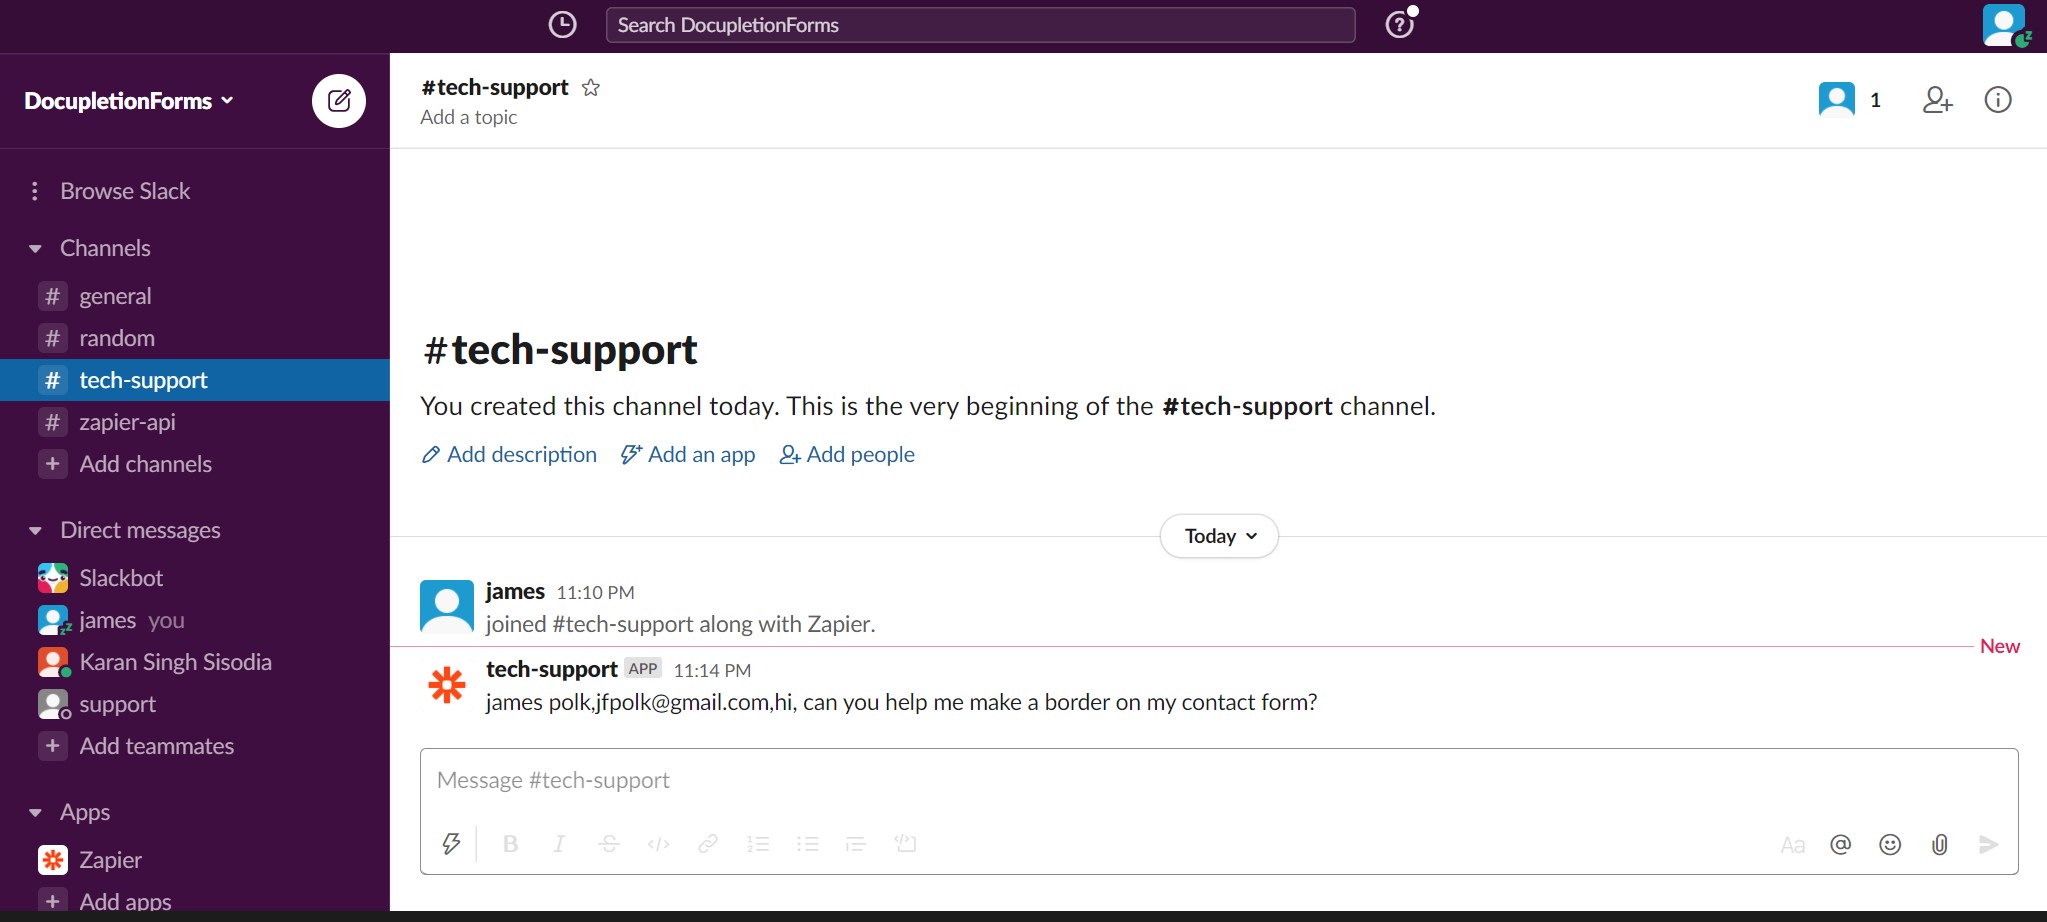
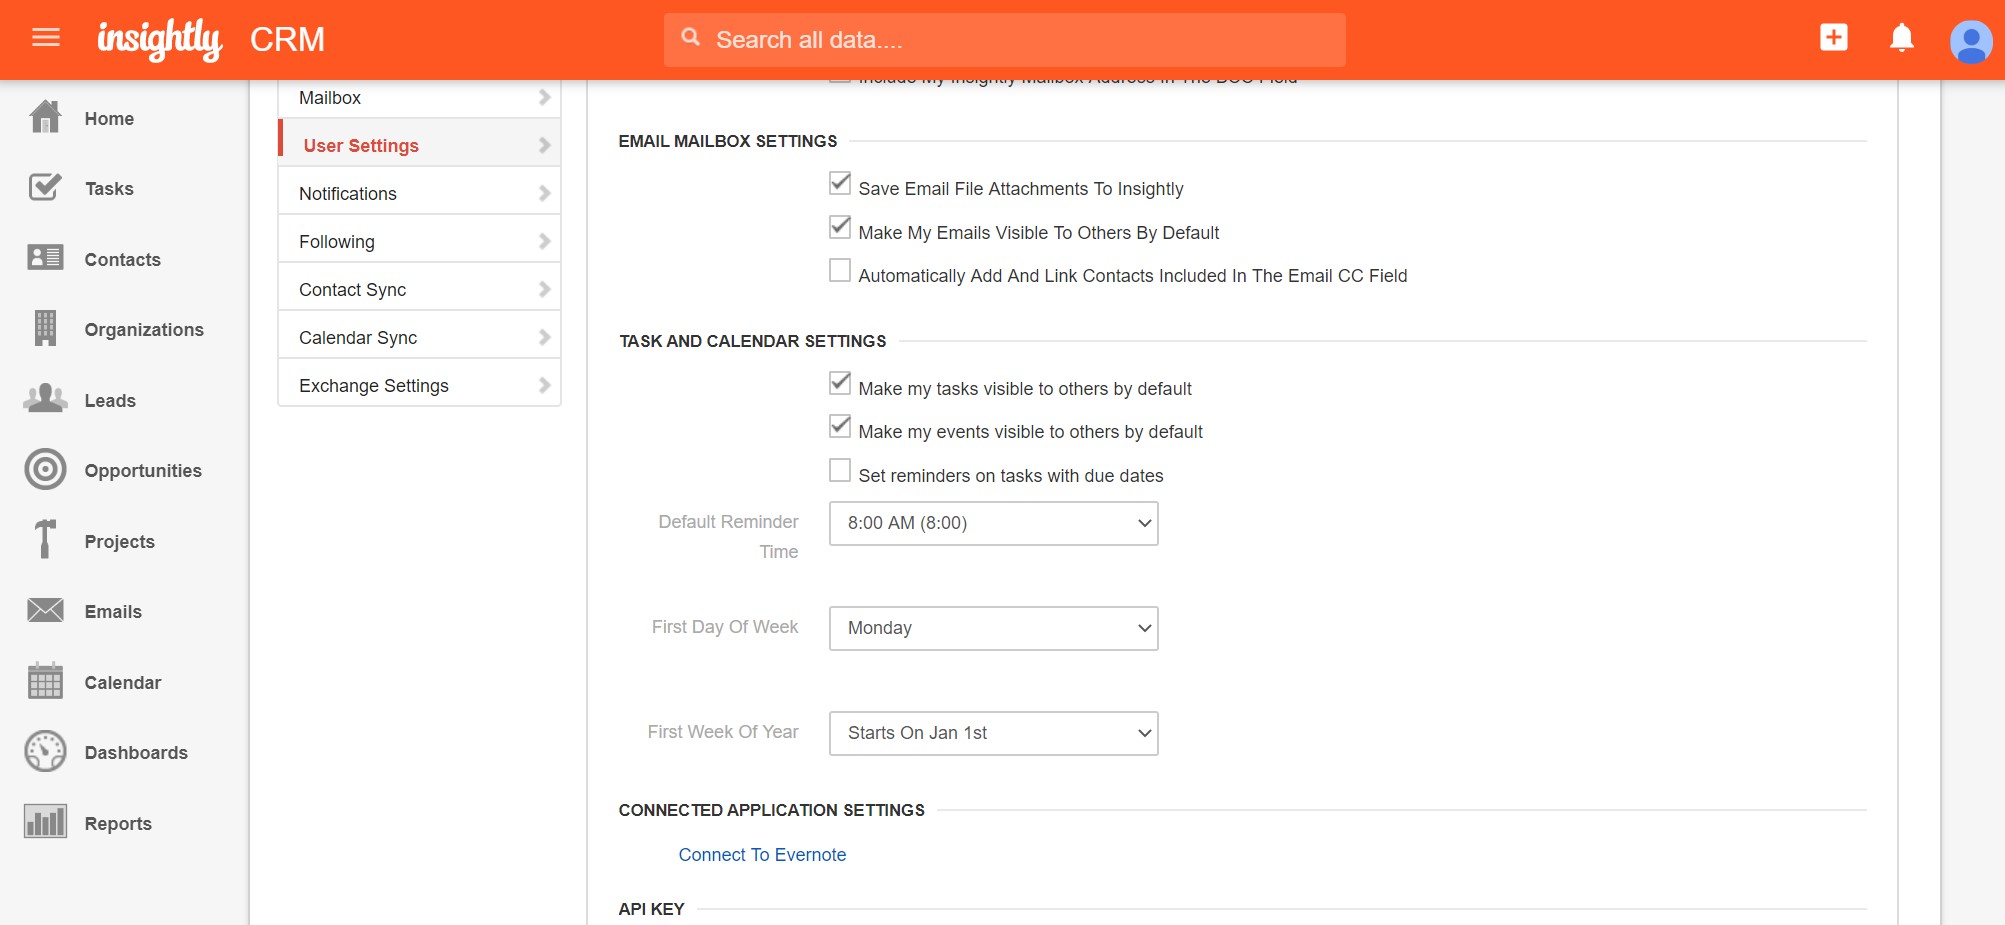
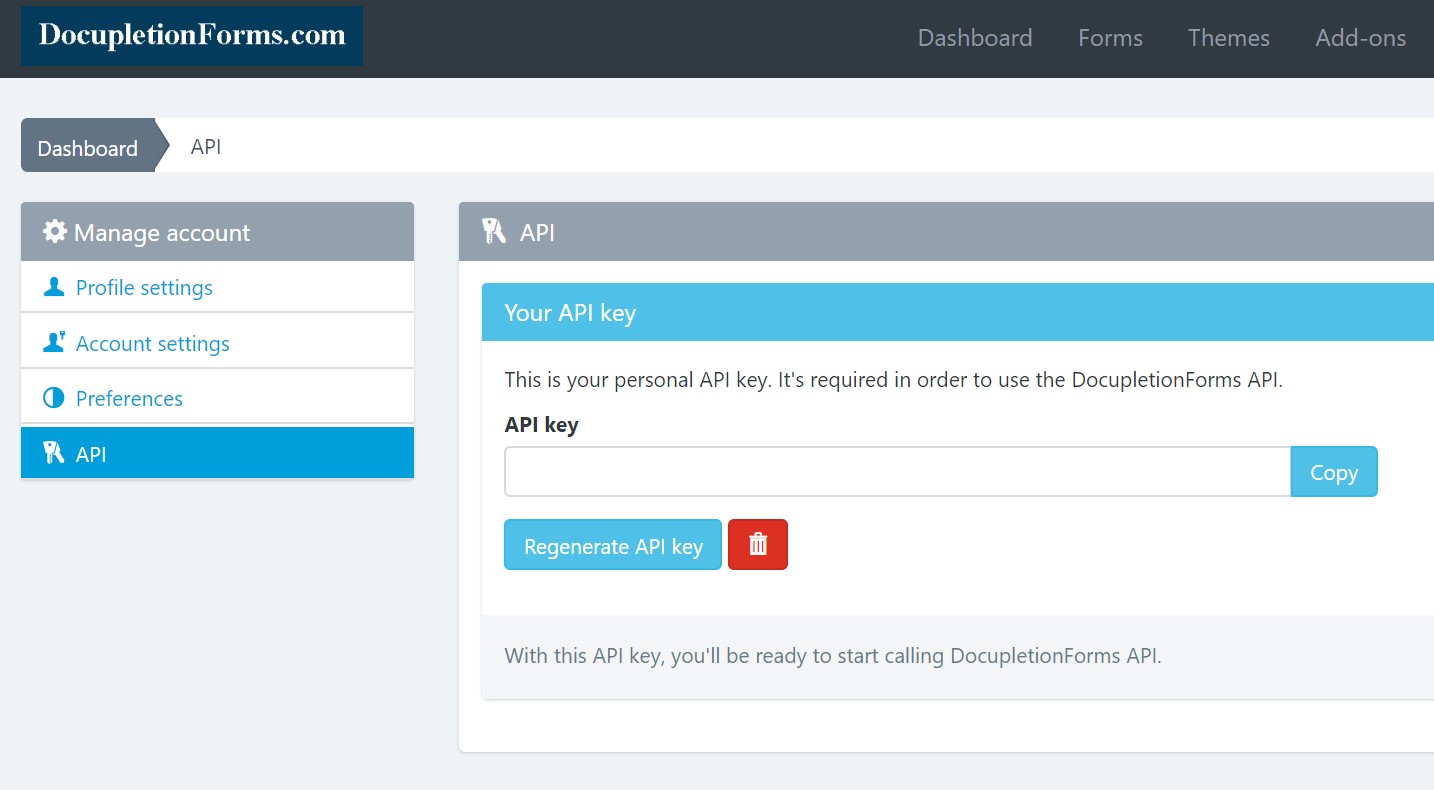
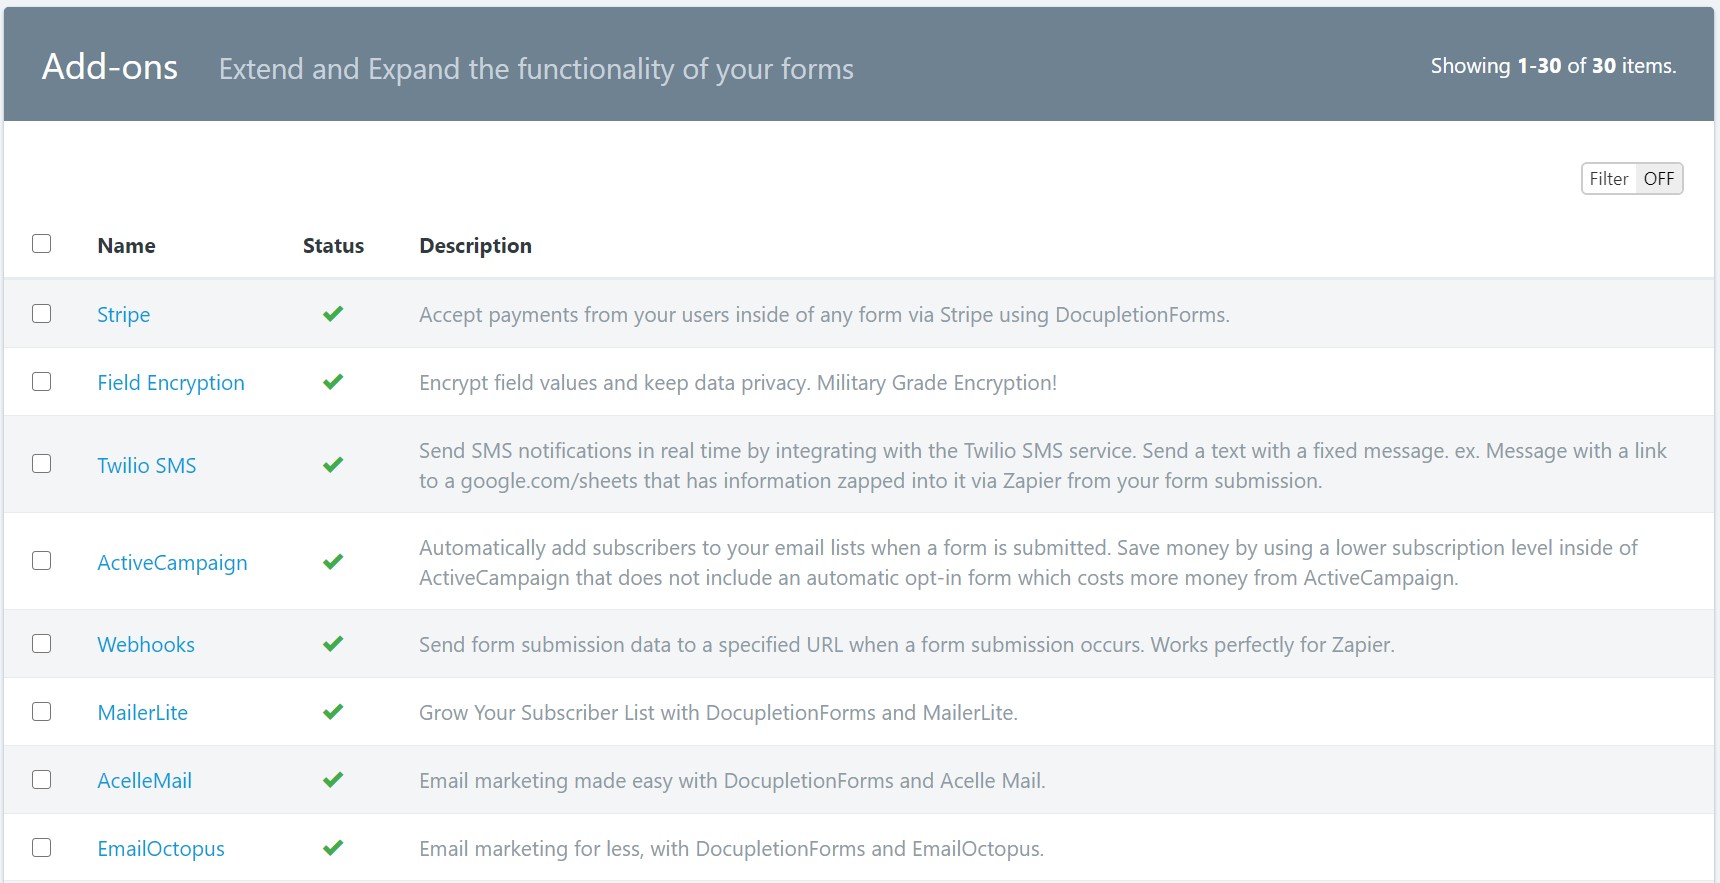
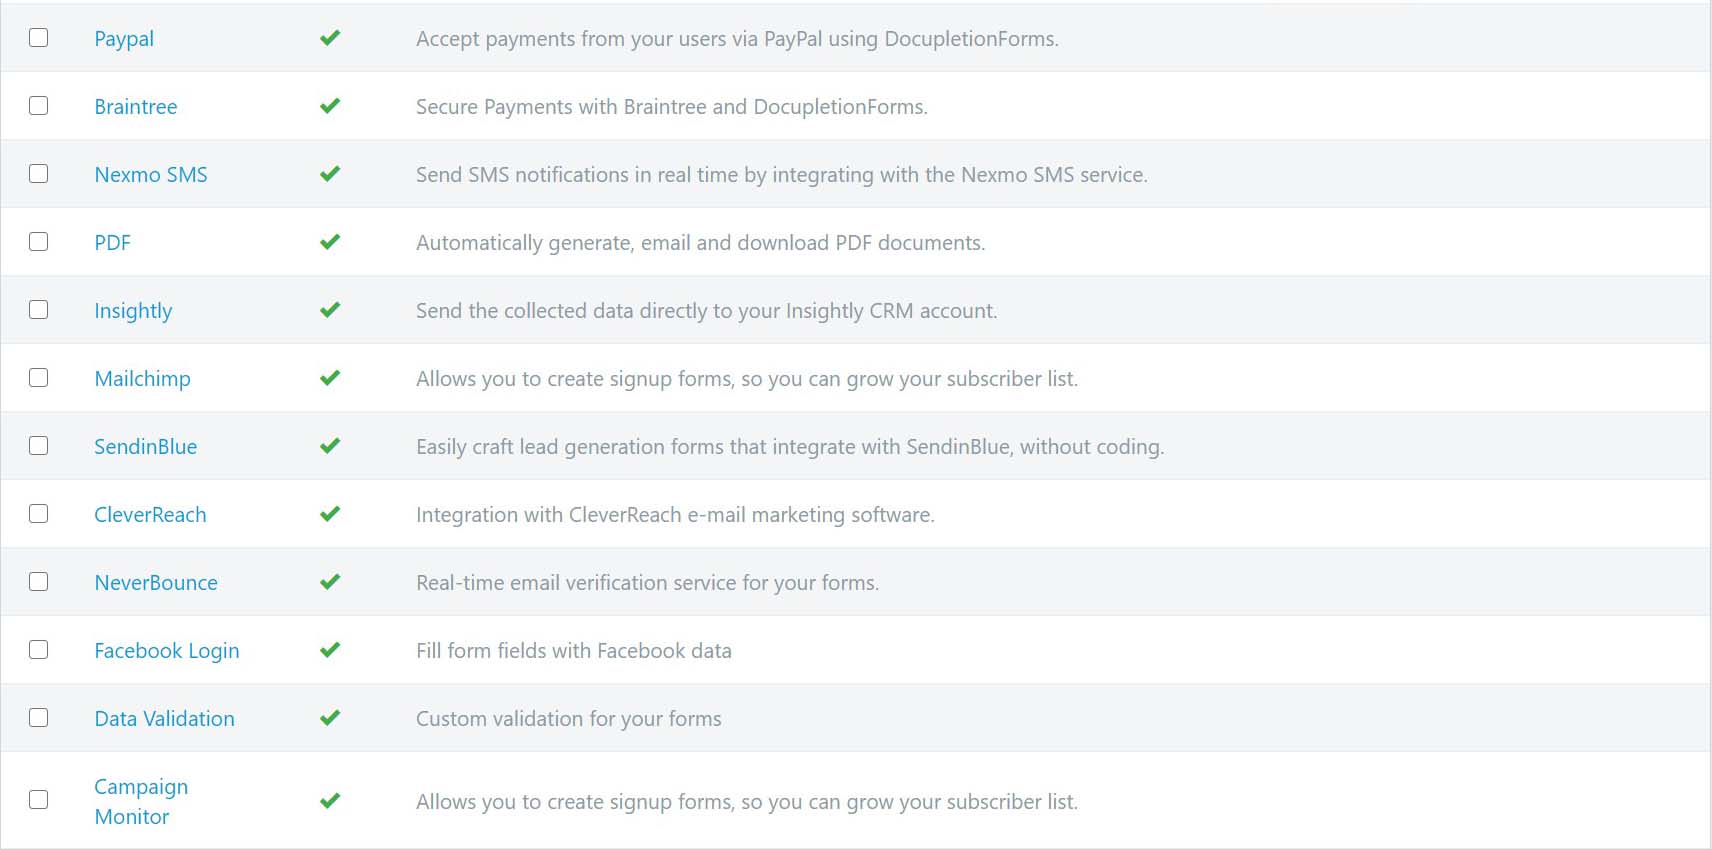
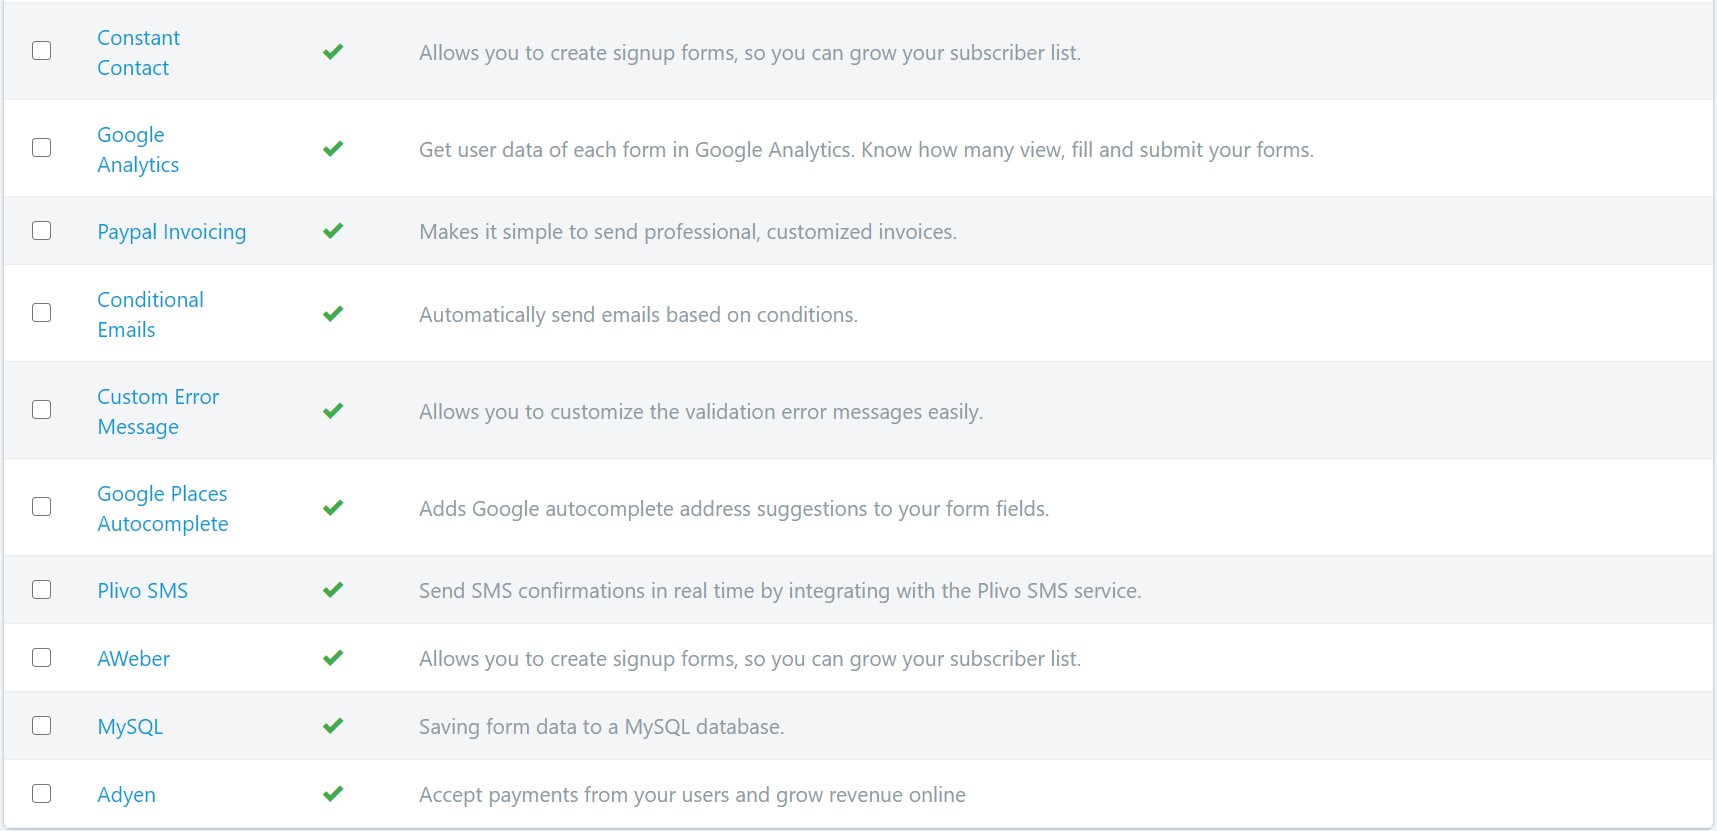
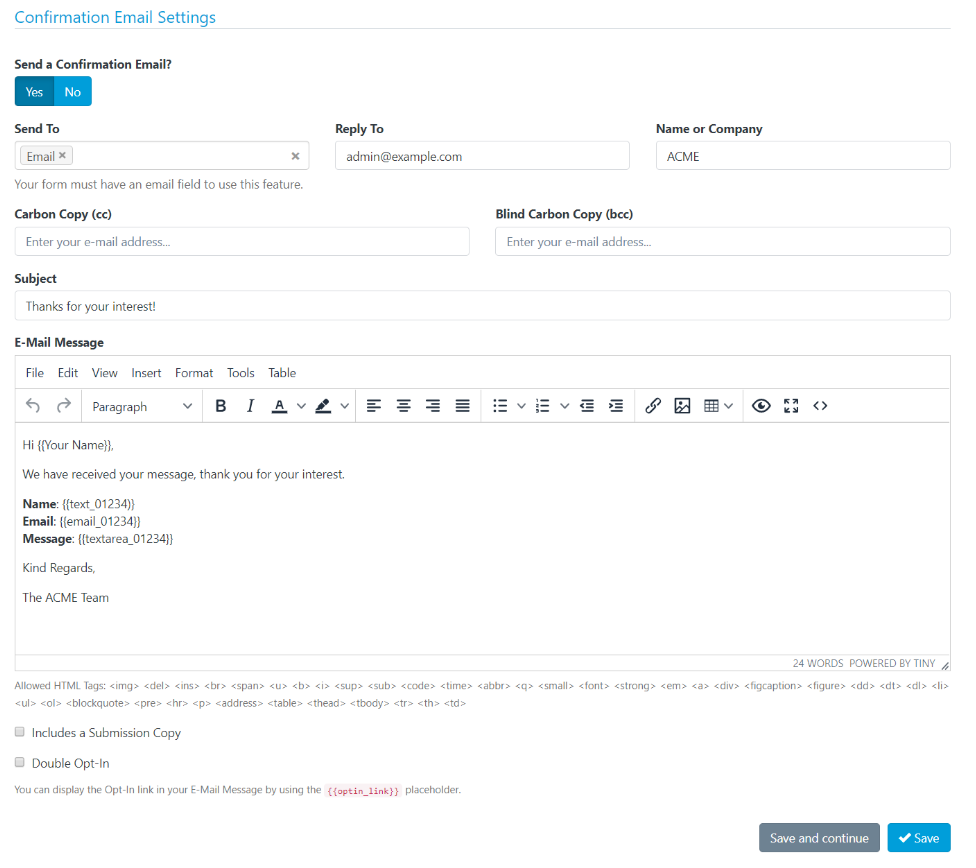
You can setup a Zap inside of your Upgraded Zapier Account to connect a Webhook by Zapier from your DocupletionForms Contact Form to your Gmail or your ActiveCampaign.  Just connect the Webhook URL inside of the program Add-ons tab to the form you want it connected to.  This is a great way to make certain that your confirmation email sent out to your client/person leaving you a message through your contact form will receive the message in their inbox and not in their spam folder.  You can connect with 2000+ different Online Software Programs via Zapier in any number of connection patterns.  Check Zapier out!  Don’t forget to read our FREE eBook on Zapier, and take a look at the Integration Instructions below:

Connect DocupletionForms to hundreds of other apps with Zapier

Zapier lets you connect DocupletionForms to 2,000+ other web services. Automated connections called Zaps, set up in minutes with no coding, can automate your day-to-day tasks and build workflows between apps that otherwise wouldn’t be possible.

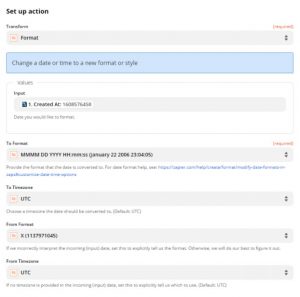
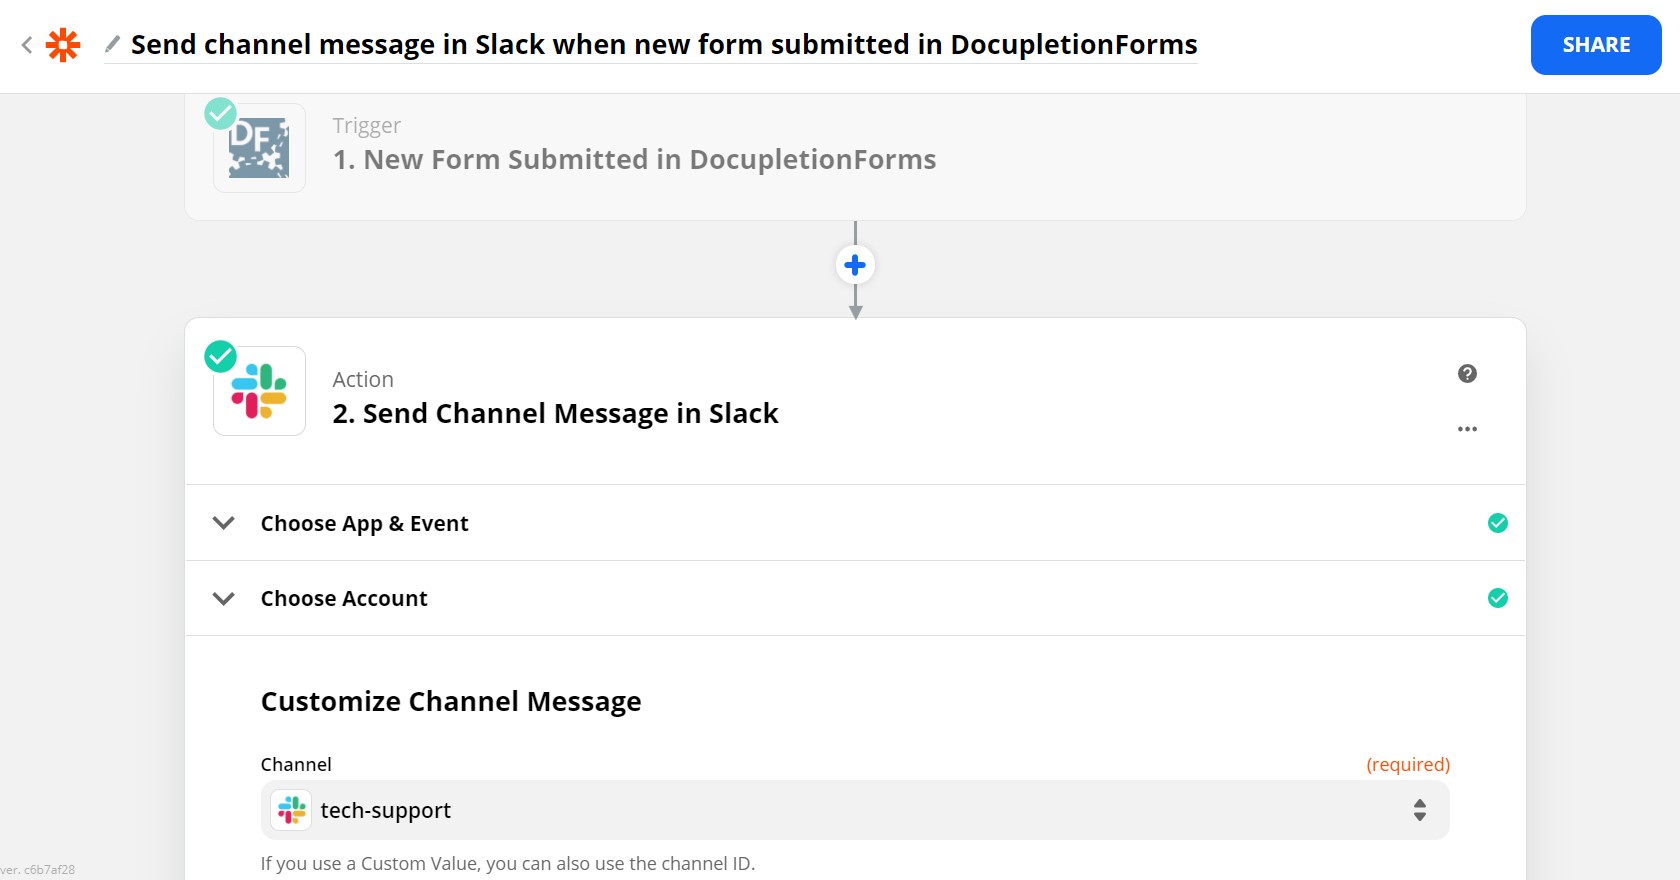
Each Zap has one app as the **Trigger**, where your information comes from and which causes one or more **Actions** in other apps, where your data gets sent automatically.

Getting Started with Zapier

Sign up for a free Zapier account, from there you can jump right in. To help you hit the ground running, here are some popular pre-made Zaps.

How do I connect DocupletionForms to Zapier?
  1. Log in to your Zapier account or create a new account.
  2. Navigate to “My Apps” from the top menu bar.
  3. Now click on “Connect a new account…” and search for “DocupletionForms”
  4. Use your credentials to connect your DocupletionForms account to Zapier.

Once that’s done you can start creating an automation! Use a pre-made Zap or create your own with the Zap Editor. Creating a Zap requires no coding knowledge and you’ll be walked step-by-step through the setup.

Need inspiration? See everything that’s possible with DocupletionForms and Zapier.

If you have any additional questions, you can reach out to contact@zapier.com.


Disable a Hidden Field that is Required When Shown!

1. If you have a checkbox that you want checked so that people filling out your form, you have to uncheck to deselect it rather than check it to select it, type the following:   

                                                         |check   

Right after the selection in the checkbox just like the illustration below.

2. Then in the field that you want shown if somebody leaves the checkbox checked, click required so that we can then go to the conditional logic to show you how to properly conditionally disable and enable the required field.

3. Check to disable the field in the add action when the checkbox is not checked.  then make sure to make a second rule (at the very bottom) that hides the field is the checkbox is not checked.  This way you do not set the field to be required and when it is hidden have a form that cannot be submitted because there is a hidden yet still required field.  fun, fun, fun.  

Link to the form so you can see the disabled element be required and enabled when selected and shown.

https://docupletionforms.com/formbuilder/forms/example-conditional-logic-form

1 2 3